
Step by Step Guide to Making Liquid Fertilizer
Liquid fertilizers have become one of the most effective and sustainable ways to provide nutrients to plants. Compared to solid fertilizers, liquid fertilizers can deliver nutrients in a form that plants can easily absorb. Plants can quickly absorb the nutrients through the soil or leaves. Making liquid fertilizers at home or on the farm is both simple and economical, and it is an excellent way to convert organic waste into valuable nutrients.
The greatest advantage of liquid fertilizer lies in its rapid effect. As the nutrients are dissolved in water, plants can absorb them quickly, and visible growth improvements can be observed within a few days. Moreover, it allows farmers and gardeners to directly apply nutrients through irrigation or foliar spraying, thereby reducing waste and improving efficiency.Liquid fertilizer is ideal for:
Vegetables, fruit trees, and flowers
Greenhouse crops and hydroponic systems
Poor or compacted soils needing microbial activity
In addition, producing liquid fertilizer supports sustainable agriculture by turning organic waste into an eco-friendly soil amendment.
A good liquid fertilizer begins with nutrient-rich organic materials. Common options include:
Animal manure: chicken, cow, or horse manure (well composted)
Compost or humus: balanced organic matter and microbes
Fish waste or seaweed: high in nitrogen and trace minerals
Plant residues or fruit peels: add potassium and natural enzymes
Avoid using raw animal waste or materials with oils, chemicals, or heavy metals. Composting or partial fermentation first ensures safety and prevents unpleasant odors during production.
Once the materials are ready, combine them with clean water in a ratio of roughly 1 part solids to 5–10 parts water.
Use a plastic barrel, container, or small tank, leaving some space for gas expansion. Stir the mixture thoroughly in the stainless steel mixing tank to help the materials dissolve evenly.
Cover the container loosely and allow the contents to ferment for 10–20 days, depending on the temperature. Stir every few days to maintain oxygen flow — this encourages aerobic microbes to break down the organic matter into plant-available nutrients.
When the liquid becomes dark brown and smells earthy rather than foul, the fermentation is complete.
After fermentation, filter the mixture using a fine mesh, sieve, or cloth to remove large particles. The filtered solution is your concentrated liquid fertilizer.
Store it in a tightly closed storage tank in a shaded, cool area. It can be used for several weeks, though fresher batches are more active biologically.
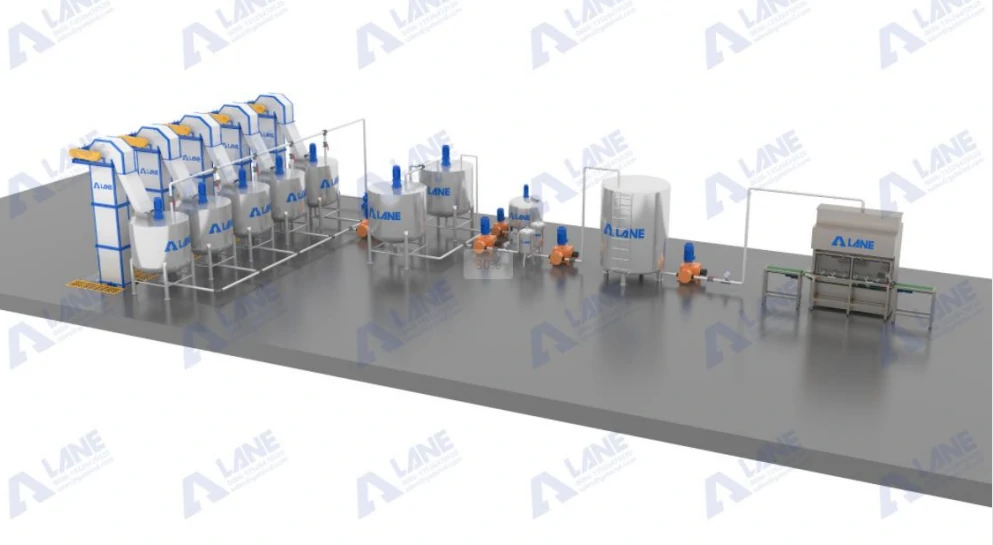
If producing larger quantities, using equipment such as a mixing tank, dual filter, or homogenizer ensures better consistency and longer shelf life.
Homemade liquid fertilizer is usually concentrated and must be diluted before use.
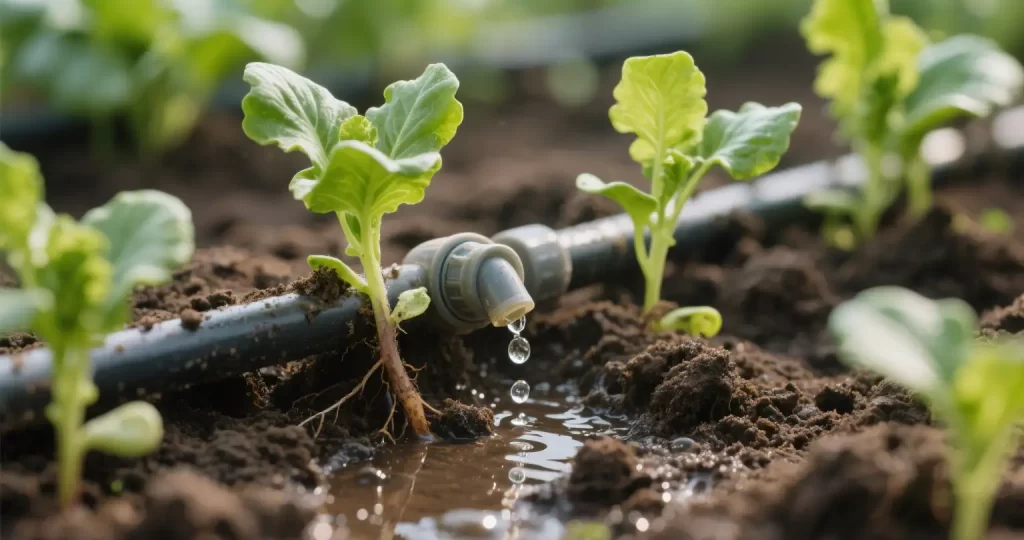
For foliar spray, mix 1 part fertilizer with 10–20 parts water.
For soil application, dilute 1:30–1:50, depending on crop type and soil condition.
Apply the liquid early in the morning or late afternoon to avoid evaporation. Spray leaves lightly or apply around the base of plants as a soil drench. Frequent but moderate feeding every 10–15 days promotes strong, steady growth.
For small farms or community composting projects, the same principle applies but on a larger scale. A liquid fertilizer production line may include:
A fermentation tank for microbial breakdown
A screw press separator for solid-liquid separation
A filtration system for clarification
A storage tank with mild agitation to prevent sedimentation
An automatic filling machine for packaging
Such setups allow farmers to recycle manure, crop residues, or food waste efficiently while meeting safety and environmental standards.
Fast nutrient absorption: Nutrients are available immediately to plants.
Balanced feeding: Can be customized for specific crops or soil conditions.
Improved soil health: Boosts microbial activity and organic carbon.
Environmentally friendly: Reduces waste and reliance on chemical fertilizers.
Cost-effective: Uses locally available organic materials.
With proper handling and regular use, liquid fertilizer can enhance crop quality, yield, and soil fertility — all while supporting sustainable agriculture practices.
Making liquid fertilizer is a simple yet powerful way to convert organic waste into a valuable agricultural product. From collecting composted materials to fermentation, filtration, and application, every step adds value to what would otherwise be waste. Whether produced on a small farm or in a modern processing line, liquid fertilizer production line remains a practical solution for farmers seeking efficiency, sustainability, and soil health improvement.
For more details, please feel free to contact us.
Henan Lane Heavy Industry Machinery Technology Co., Ltd.
Email: sales@lanesvc.com
Contact number: +86 13526470520
Whatsapp: +86 13526470520
Leave a Comment
Latest Posts
LANE has more than 500 successful cases and is committed to providing customers with first-class solutions, high-end machinery and equipment, and one-stop pre-sales, sales and after-sales comprehensive customer service.